While there are thousands of clay bodies available for purchase, the 3 basics types are porcelain, stoneware and earthenware. The maturity temperature, workability, and color of these 3 categories can vary based on what is added. Before we talk about the specific clay bodies it would be helpful to talk about the properties that define them.
Properties
Temperature
Different clay bodies “mature” at different temperatures. By “mature” we mean fired to the point for which they were formulated. In general terms, the higher a clay body is designed to fire, the more vitreous it is.
When a clay body is vitreous, it means that water cannot be absorbed into the clay when it is fired to maturity. This is important because it can affect how susceptible the clay is to freezing.
For example let’s say you lived in an area where it often froze at night and you wanted to make a fountain with ceramic tile. If you chose a clay body that was non-vitreous, water could enter the pores of the clay body during the day when it is warm. At night, when the temperature drops, the water would freeze and turn to ice. Since water expands when it turns to ice, the clay body would be more susceptible to cracking.
When we talk about clay body firing temperatures we refer to low fire, mid fire and high fire. These are the temperatures you fire the clay to during your bisque fire. You will notice that only the common cone ranges are listed. Here are the temperature ranges:
Low Fire – Cone 06 – Cone 04 (1828 F – 1945 F)
Mid Fire – Cone 5 – Cone 6 (2167 F – 2232 F)
High Fire – Cone 8 – Cone 10 (2280 F -2345 F)
Workability
The workability of a clay generally refers to how easy it is to shape without problems. If problems do occur, a workable clay would allow you do fix those problems and continue. For example, if you were throwing a large plater on the wheel, the workability of the clay would affect how easy it is to center the clay, open it into a cylinder, and hold its shape when it is formed.
Color
The color of a clay is affected by the materials that are in it. For example, a clay body that has a lot of iron it will be red. A clay with a lot of manganese will be blackish in color. The shade of these colors can change some when you fire it but for the most part, unlike glazes, they remain the same base color.
Porcelain
A high-firing fine-grained white clay body that fires to a durable, strong, vitreous ceramic. It is usually pure white because of its high kaolin content and lack of other ingredients like iron that can change the color and properties. Since kaolin is the purest form of clay, porcelain lacks some of the additives that make clay more plastic (stretchy) making it not the most plastic of clay. This gives it the reputation of being difficult to work with—though modern formulations have addressed this.
Stoneware
A mid- or high-firing coarse-grained clay body that can be anywhere between buff color to gray to dark brown, because of varying levels of iron and other “impurities”. It is incredibly durable after firing, with little to no absorption (vitreous).
Earthenware
A low-firing fine-grained clay body that is typically found in creek beds and other deposits that have been transported by wind and/or water from their location of origin. This transportation aids in the weathering and breaking down of the source rock into clay, and also adds “impurities” like iron, which is what makes earthenware brown, orange, or red, both in the raw state, and after firing.
Because it is fired low, it is more porous and relatively less durable than stoneware or porcelain, but that can be an advantage in some cases. Terra cotta garden planters are a type of earthenware clay, for example, and the fact that they are porous and can “breathe” is a design advantage.


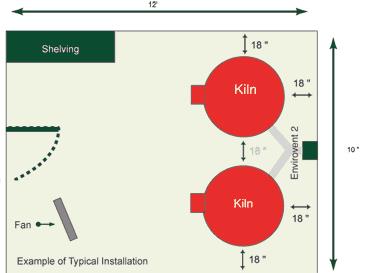 When considering the size of your new kiln you should ask yourself 4 questions:
 Controls
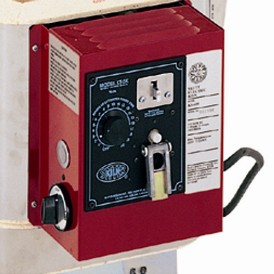 KilnSitter
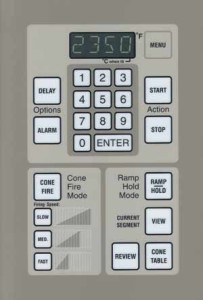 Digital Controllers